To use the Aptera Solar Calculator add-on for Blender follow these four steps:
- Step 1) Download and install Blender. The add-on was written for Blender version 3.3.1 and later. Download the latest version of Blender from this link and follow the on-line instructions to complete the installation.
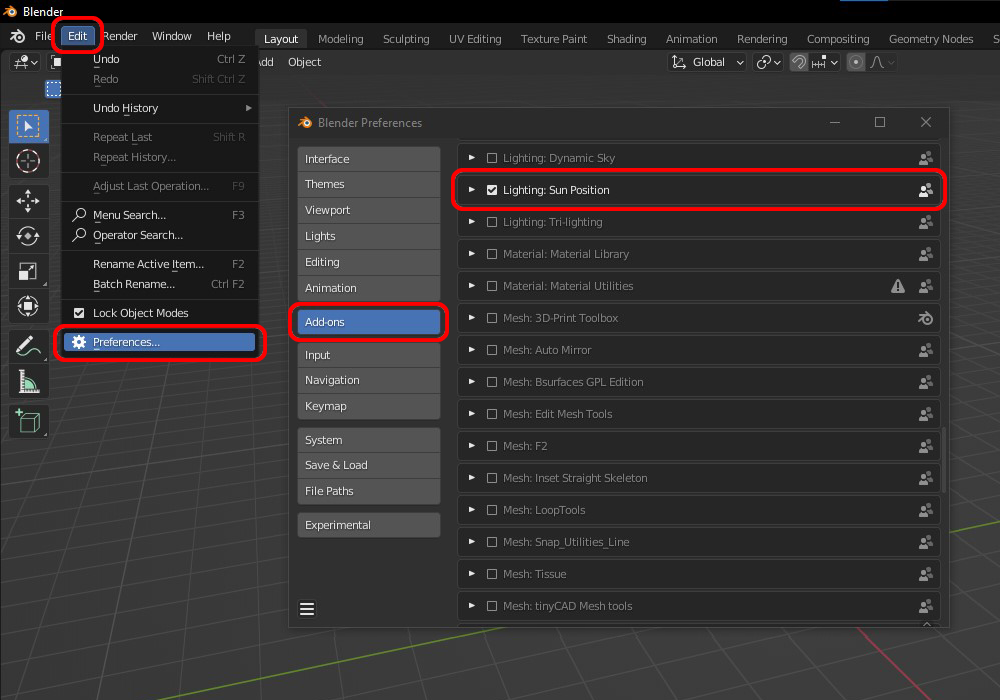
- Step 2) Enable the Sun Position add-on that is shipped with Blender. Launch Blender and click Edit / Preferences, then click the Add-ons button to see all the available add-ons that come as part of the Blender install. Search the list of add-ons for Lighting: Sun Position and click the box next to the name to enable it. When finished, close the Blender Preferences window.
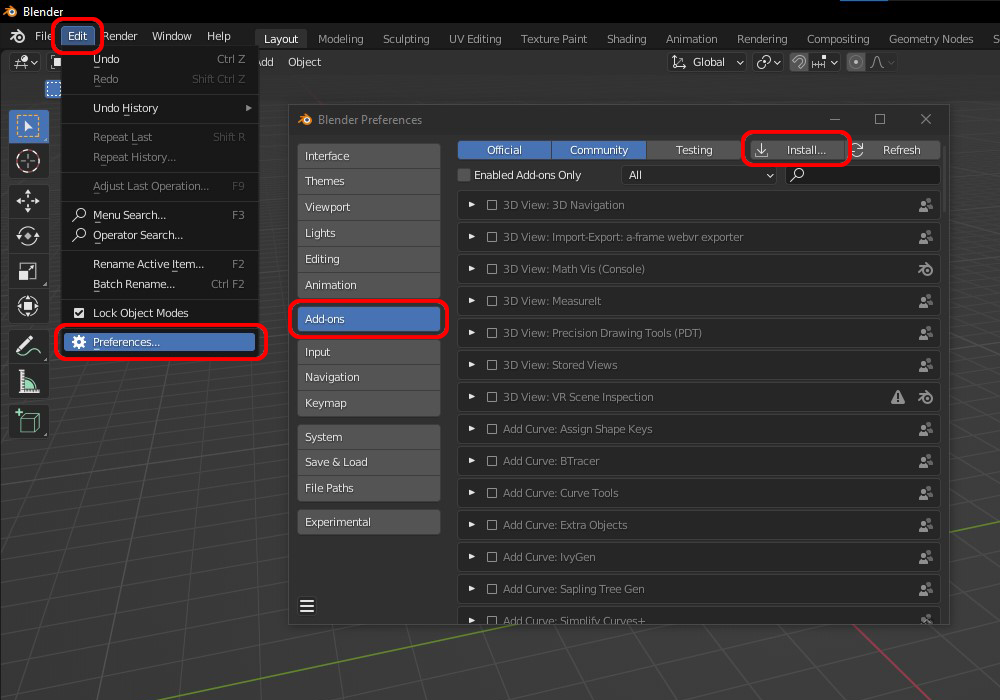
- Step 3) Download and install the Aptera Solar Calculator add-on. Click here to download the file ApteraSolarCalc.zip to your computer. Unzip the downloaded file and extract the two files to a location on your computer. Go back to Blender and click Edit / Preferences, then click the Add-ons button followed by the Install button. Select the extracted file ApteraSolarCalcScript.py and click Install Add-on.
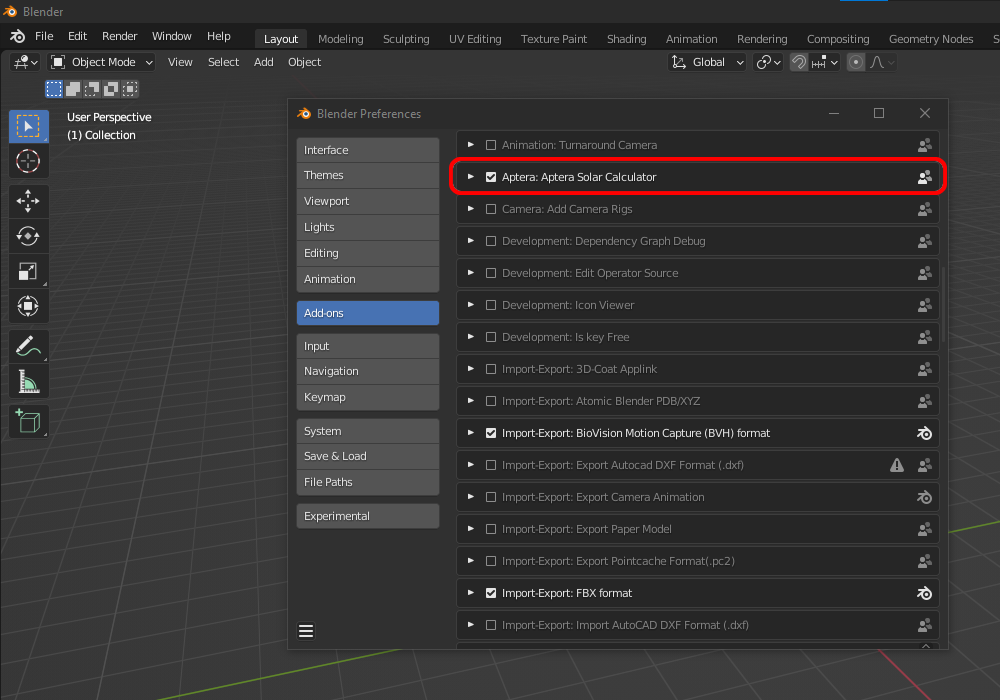
Once installed you will see it on the list of available add-ons as Aptera: Aptera Solar Calculator and it should be enabled by default.
- Step 4) Open the Aptera Solar Calculator blend file in Blender. This file is contained in the zip file downloaded in step 3 above and has all the 3D objects that the add-on needs. From Blender go to File / Open and select the extracted file ApteraSolarCalc.blend. Once you have opened the file in Blender the screen should look something like this.
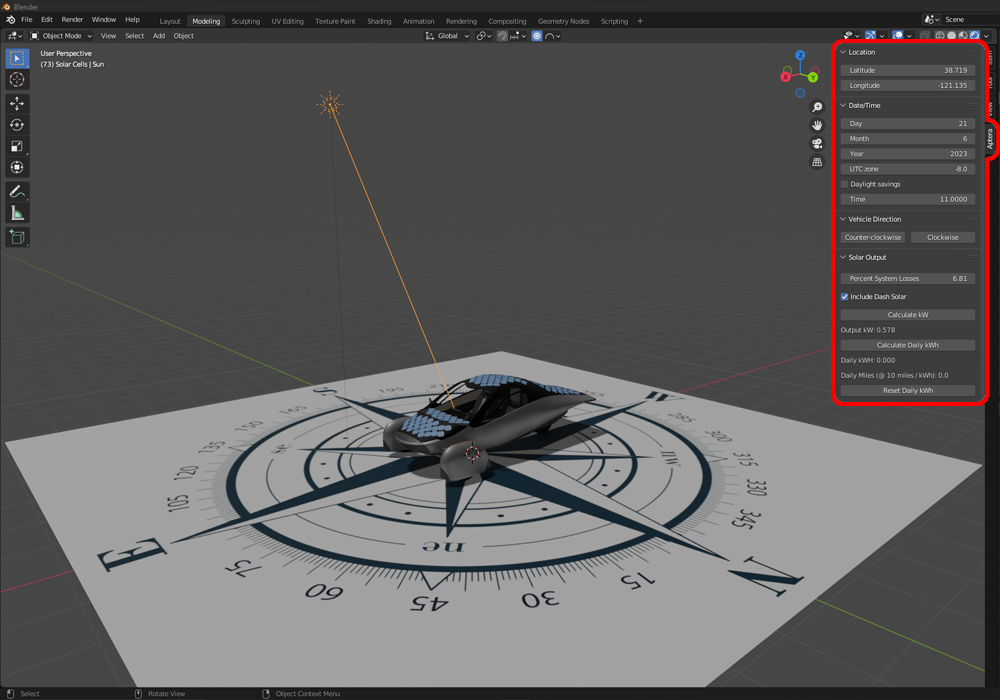
To view the control window for the add-on (outlined in red above), click the N key on your keyboard to toggle the sidebar visibility, then select the tab in the sidebar titled Aptera.
For instructions on how to use the Aptera Solar Calculator add-on for Blender, reference this YouTube video.